Administration Console Package
In openEQUELLA versions prior to 2019.1, the Administration Console was launched from the openEQUELLA Settings page using Java Web Start. As time progresses, there are an increasing number of organisations who would prefer not to have Java installed on the client side as part of the Standard Operating Environment (SOE).
Until the Administration Console functionality can be transferred to the web, an interim solution in the form of an Administration Console ‘package’ is available to use with openEQUELLA 2019.1 and future releases. This package bundles the Java Runtime Environment (JRE) with the Administration Console and allows users to access the Administration Console on local systems. This will remove the requirement to install Java locally and this package will be the access point to the Administration Console from openEQUELLA 2019.1 forward.
Downloading the package
There are three Administration Console Packages available on GitHub, one each for Windows, Mac and Linux operating systems.
To download the package
-
Go to https://github.com/openequella/openEQUELLA-admin-console-package/releases and download the required operating system package.
-
Extract the package files to your preferred location on your local drive.
Opening the Launcher
The Launcher enables the configuration of openEQUELLA servers and the launching of their respective Administration Consoles, as well as various other functions.
To open the Launcher, double-click the relevant launcher file
(Windows-launcher.bat, Mac-launcher.sh, or Linux-launcher.sh). You may wish
to create a shortcut for this file as you will use it each time to access an
Administration Console. The openEQUELLA Administration Console Launcher
displays. An example is shown in Figure 1.
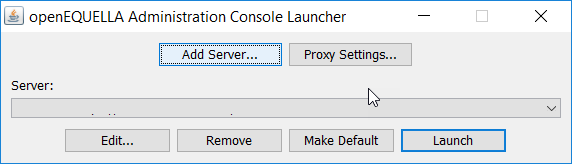
Figure 1 openEQUELLA Administration Console Launcher
openEQUELLA Administration Console Launcher components
The openEQUELLA Administration Console Launcher has the following functions:
-
Add Server – enables the openEQUELLA servers and their institutions to be configured so that their Administration Consoles can be launched. See Adding servers.
-
Proxy Settings – enables the details of a Proxy Host to be configured to allow access to the Administration Console.
-
Server – a drop-down list of configured openEQUELLA servers and their institutions.
-
Edit – enables the details of the currently selected Server to be modified.
-
Remove – removes the currently selected Server.
-
Make Default – click to make the currently selected Server display as the default when the Launcher app is opened.
-
Launch – launches the Administration Console for the selected Server.
Adding servers
Once the package is installed, each openEQUELLA server and institution must be configured to access their respective Administration Consoles. For example, if your organisation has a production environment and a test environment and you have access to the Administration Console for both instances, you are required to add both servers. Additionally, if there are multiple institutions on each server, a server record must be added for each institution.
To add a server
-
Open the Launcher using the relevant launcher file (
Windows-launcher.bat,Mac-launcher.sh, orLinux-launcher.sh). -
Select Add Server. The Server Editor dialog displays, as shown in Figure 2.
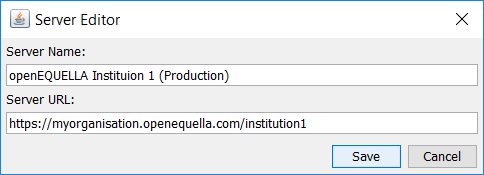
Figure 2 Server Editor
-
Enter a Server Name - a descriptive name for the openEQUELLA institution.
-
Enter the Server URL - the full openEQUELLA domain, including the institution name. For example,
https://myorganisation.openequella.com/institution1. -
Click Save.
Cloning servers
Once one server has been configured, on selection of the Add Server button, the user is presented with the option to clone the currently selected server. Selecting Yes to this option will prefill the Server Name and Server URL fields with the currently selected server details, and the user can adjust them to the required values.
Selecting No to this option will leave the Server Name and Server URL fields blank.
Launching the package
Once a server record has been added for an institution, the Administration Console for that institution can be opened.
To launch the Administration Console
-
From the openEQUELLA Administration Console Launcher, select the required Server.
-
Select Launch to open the Admin Console for the selected server/institution. An example is shown in Figure 3.
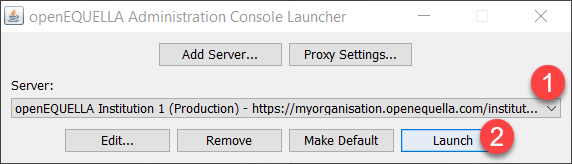
Figure 3 Launch the Admin Console
The Enter login credentials dialog displays. An example is shown in Figure 4
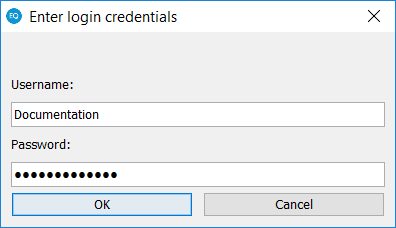
Figure 4 Enter login credential dialog
- Enter your login credentials
NOTE: Login credentials will be requested each time an Administration Console is launched.
The Administration Console for the selected Server/Institution opens.