openEQUELLA Advanced Search Configuration Guide
Table of Contents
Advanced search overview
The openEQUELLA Advanced search function provides a means of searching within specific metadata associated with a resource. Each advanced search must be associated with a particular metadata schema, which makes it customised for certain resource types, enabling refined searches within those resource types. It makes searching for a particular resource easier, and can be targeted to specific users, groups or roles.
The purpose of this guide is to provide administrators with an understanding of the configuration and use of the Advanced Search function.
Please note that this guide has been developed to best reflect the full capabilities of openEQUELLA and as such may differ in appearance to your own installation.
Advanced search configuration
Advanced searches are created and maintained via the Advanced Searches configuration tool accessed from the Administration Console.
To access Advanced Searches configuration tool
- Log in to the openEQUELLA Administration Console and select Advanced Searches, as shown in Figure 2.
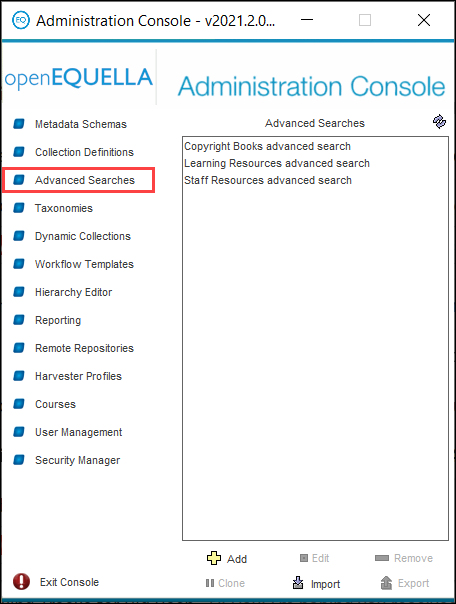
Figure 2 Administration console—Advanced Searches
Administration console elements
When a tool has been selected the Add, Edit, Remove, Clone, Import and Export buttons are enabled.
-
Add—click to display the Advanced Search Editor where a new advanced search can be created. See Create an advanced search.
-
Edit—select an Advanced search then click Edit, or double-click on an advanced search, to display the Advanced Search Editor to modify the selected advanced search. If the selected advanced search is being edited by another user a Locked dialog is displayed as shown in Figure 3, providing the following options:
-
Open as read-only—disables the Save button so that no changes can be committed.
-
Forcefully unlock—unlocks the entity from the previous editor. Editing is possible but changes by other users may be lost.
-
Do not open—the advanced search configuration screen will not be opened.
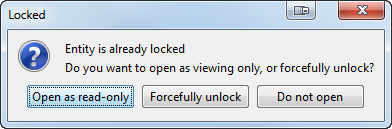
Figure 3 Locked entity dialog
-
Remove—click to delete the selected advanced search.
-
Clone—click to copy an existing advanced search. The cloned search can then be modified by selecting the Edit button.
-
Import—click to import an advanced search that has previously been exported from the Administration Console. A warning dialog displays, as shown in Figure 4. (NOTE: Only ZIP files that have been exported from the Administration Console should be imported—other ZIP files may adversely affect the stability of the system.)

Figure 4 Import Advanced Search warning dialog
- Export—click to export an advanced search as a ZIP file.
Metadata targets
Every advanced search must be associated with a metadata schema and the collections that use that schema. When configuring an advanced search, defined metadata targets, or nodes, within the schema are selected. Each one of these metadata targets must be set up for advanced search indexing.
To set up metadata schema nodes to index for advanced searching
-
Select the Metadata Schemas option from the Administration Console to display the Metadata Schemas pane on the right-hand side of the page. A list of existing metadata schemas displays. An example is shown in Figure 5.
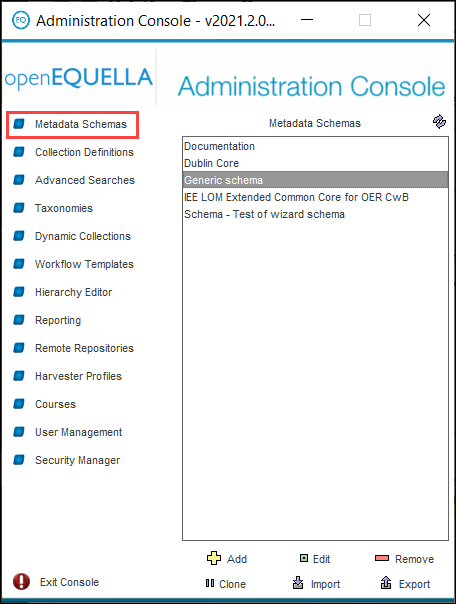
Figure 5 Administration Console—Metadata Schemas pane
-
Select the relevant schema from the list.
-
Double-click or select the Edit link. The Schema Manager will open at the Details page as shown in Figure 6.
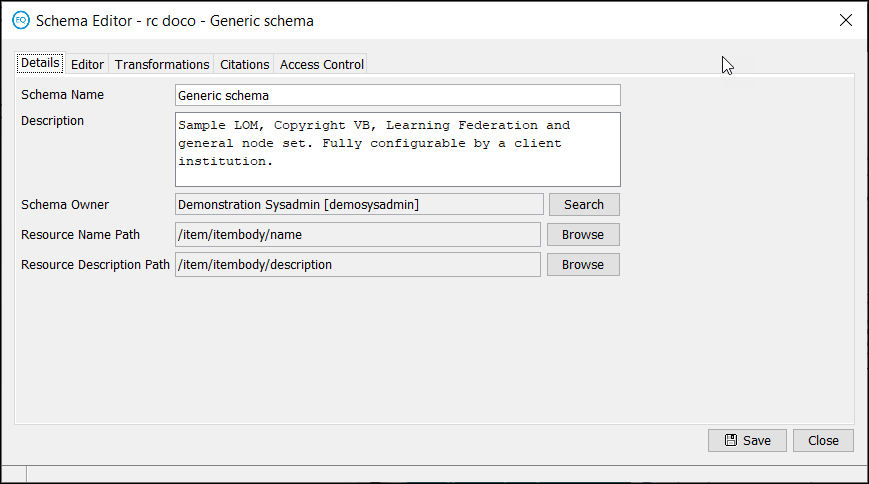
Figure 6 Schema Manager—Details page
-
Select the Editor tab. The Schema Manager—Editor page is displayed as shown in Figure 7.
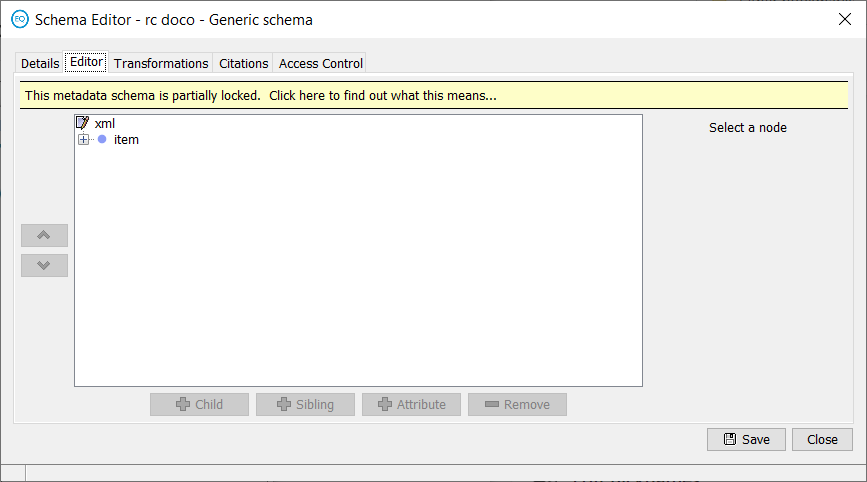
Figure 7 Schema Manager—Editor page
Previously created metadata schemas display an information bar stating that the schema is ‘partially locked’, meaning that only certain types of actions can be performed that will not be detrimental to existing resources contributed with this schema. Unlocking a schema allows for complete control, but some changes to a schema can cause associated collections or searches to create invalid data or not perform correctly. Be mindful of this risk when choosing to unlock and change any elements of an existing schema.
You will need to choose to unlock the schema to access the advanced search indexing field:
-
Click the gold information bar. The Schema Partially Locked dialog is displayed. An example is shown in Figure 8.

Figure 8 Schema Partially Locked dialog
-
Click Unlock. A confirmation dialog is displayed.
-
Click Yes.
To configure the schema
-
Click the + button beside the item node to open the tree.
-
Select the appropriate node.
-
Check the Index for Advanced Searches checkbox, as shown in Figure 9.
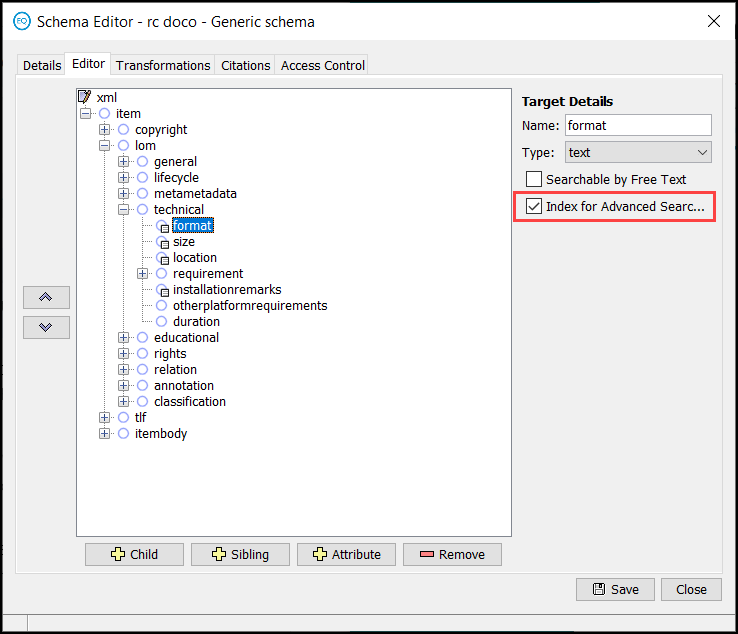
Figure 9 Index for Advanced Searches checkbox
-
Select further nodes for indexing as necessary.
-
Click Save.
-
Click Close to return to the Administration Console.
Create an advanced search
To create a new advanced search
-
Select the Advanced Searches option from the Administration Console.
-
Select the Add link. The Advanced Search Editor—Details tab displays, as shown in Figure 10.
Details tab
The Details tab is where the metadata schema and related collections to be associated with the advanced search are selected.

Figure 10 Advanced Search Editor—Details tab
The configurable Details page elements are:
-
Advanced Search name and description—enter a meaningful name and description to enable users to easily identify the purpose of the search.
-
Owner—the owner of the search (by default this is the search’s creator).
-
Select metadata schema—select the schema the search will target.
-
Select collections to search—select from the displayed collections associated with the chosen schema.
Configure the Details page
-
Enter the name of the search (e.g. Learning Resources) in the Advanced search name field.
-
Enter a description of the search in the Description field, if required.
-
The Owner field is set to default to the current user. If required, click the Search button to open a Select Recipients… dialog to select a different owner.
-
Select a schema from the You must select a schema to continue drop-down list. All collections that are associated with the selected schema will be displayed in the Select collections to search pane. An example is shown in Figure 11.
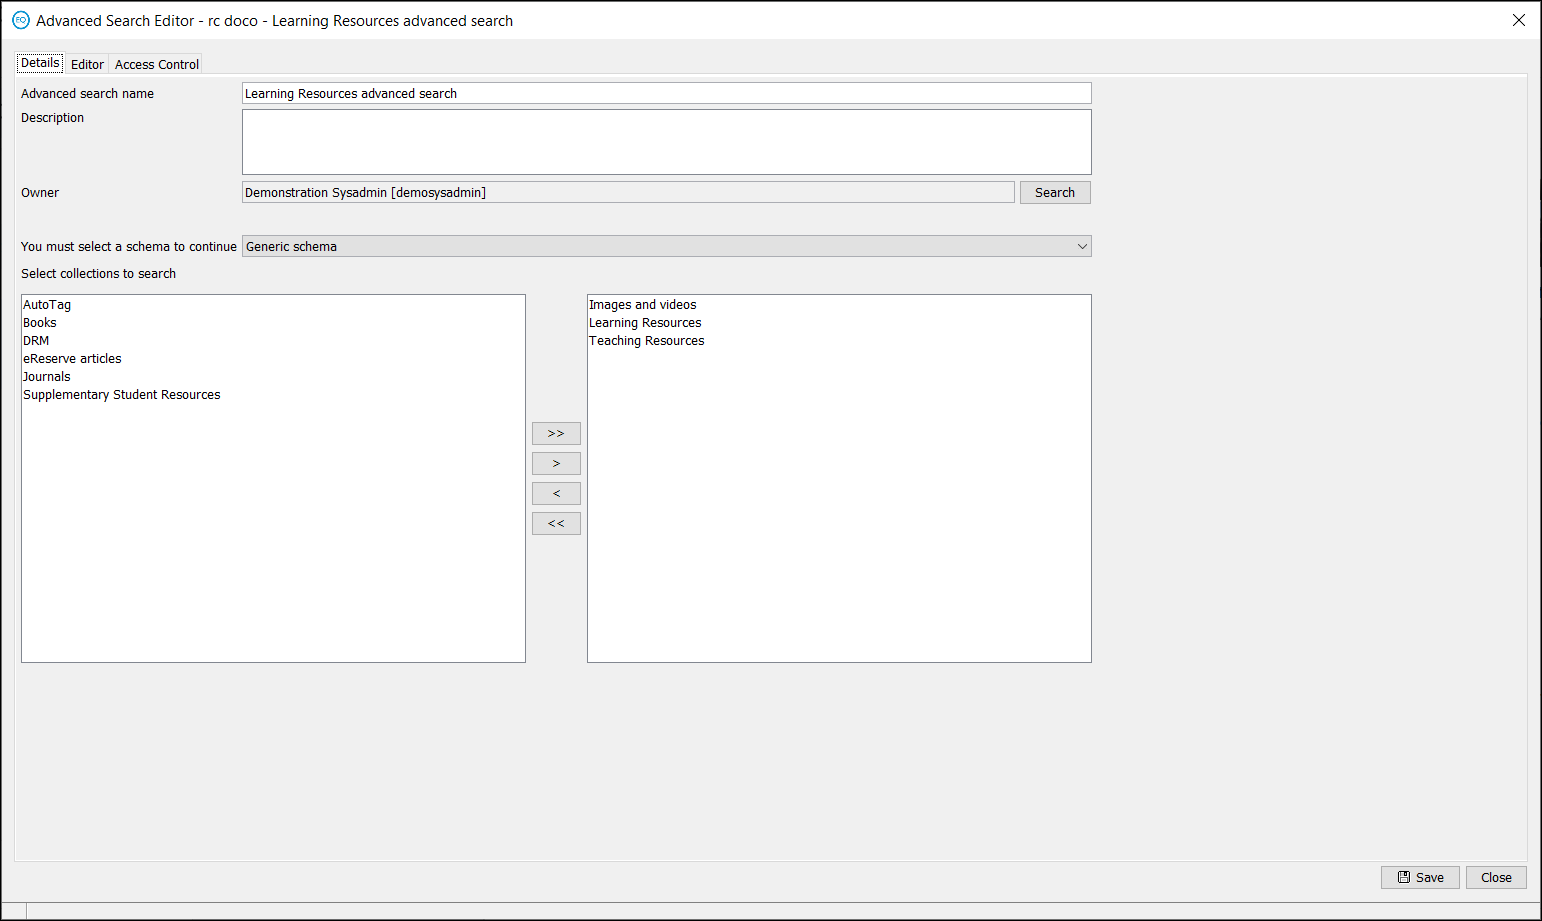
Figure 11 Advanced Search Editor—Details page with schema selected
An advanced search can be limited to search only within particular collections. To select which collections to be searched:
-
Select the required collection and click the right button to move it to the right-hand pane, or
-
Click the double-arrow right button to select all collections for searching. All collections are moved to the right-hand pane as shown in Figure 12.
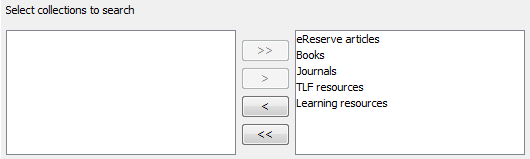
Figure 12 Selected collections displayed in right-hand pane
-
Move unwanted collections back to the left-hand pane by clicking the arrow buttons.
-
Select the Editor tab to display the Editor page, as shown in Figure 13.
Editor tab
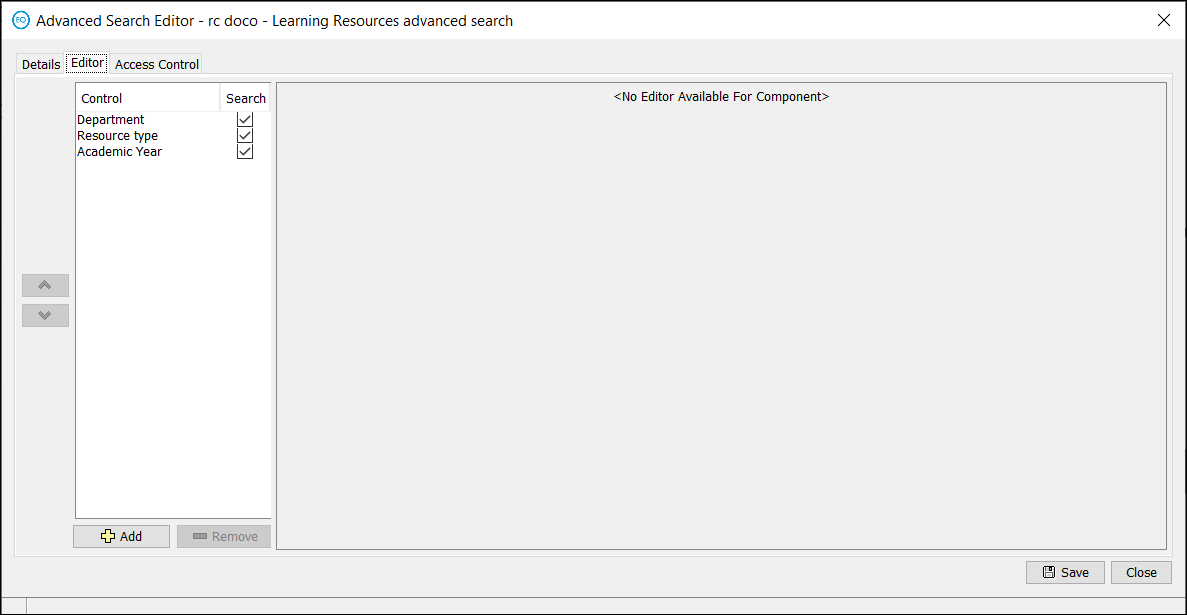
Figure 13 Advanced Search Editor—Editor tab
An advanced search can be regarded as a simplified wizard. Unlike wizards, advanced searches display only one page and use a restricted set of controls. The Editor page displays controls in the Control list pane located on the left-hand side of the page. Each control targets a node from the metadata schema. The targeted nodes are searched using the criteria entered or selected by the user.
The Editor page contains the following elements:
Control list pane
The Control list pane is located on the left-hand side of the page. This pane displays the controls that are shown to users of the advanced search. Select a control to display its details in the Control Editor pane on the right-hand side of the page.
Control Editor pane
The Control Editor pane is located on the right-hand side of the page. This pane displays the details of the selected control. Its appearance will differ for each control.
Navigation arrows
The buttons to the left of the control list pane allow the user to change the order the controls appear in the advanced search. The up arrow moves the selected control upwards on the page, and the down arrow moves it downwards.
Add button
Add opens the Select a control… dialog, as displayed in Figure 14.
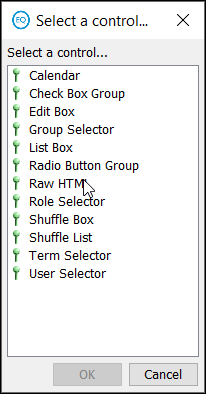
Figure 14 Select a control… dialog
A brief explanation of the available controls is provided below:
-
Calendar—allows searching by date.
-
Check Box Group—displays a check box group from which one or more elements can be selected.
-
Edit Box—allows for the entry of basic keywords.
-
List Box—features drop-down options to select from.
-
Radio Button Group—displays a group of options from which only one can be selected.
-
Raw HTML—allows the entry of HTML code.
-
Shuffle Box—allows for the selection of one or more items by moving them from one pane to another using arrow buttons.
-
Shuffle List—allows the entry of any number of elements to a list.
-
Term Selector—allows for the selection of pre-existing terms.
-
User Selector—allows for the search and selection of openEQUELLA users.
Each control must target a specific metadata schema node.
Remove button
Click to delete the selected control from the advanced search.
Save button
Click to save the current advanced search.
Close button
Click to close the advanced search editor.
Configure the Editor page
-
Click Add to display the Select a control… dialog.
-
Select an appropriate control.
-
Click OK. The dialog will close and the selected control is displayed in the left-hand pane of the editor, as shown in Figure 15.
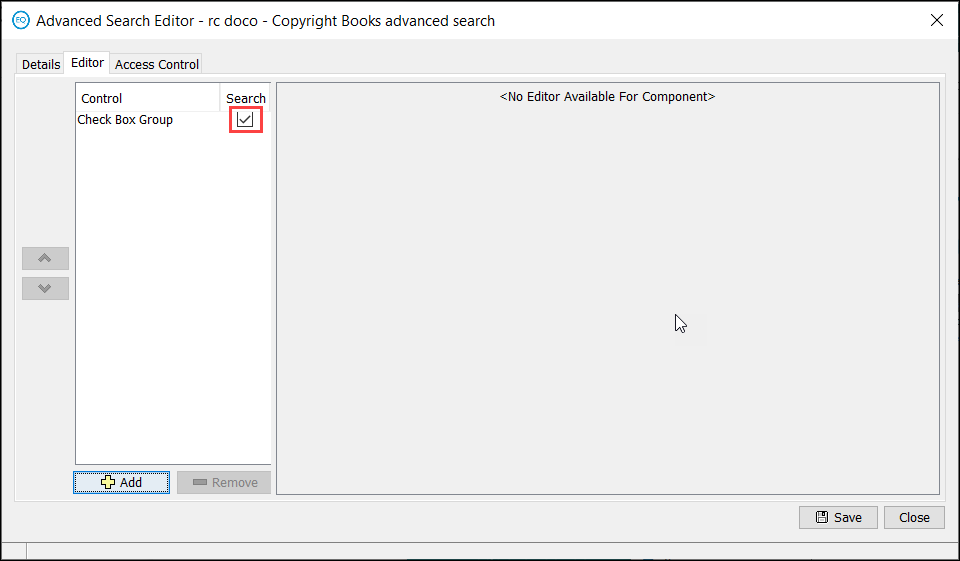
Figure 15 Advanced Search Editor—control added
The Search checkbox controls whether the search control is functional to the user. If unchecked, the user may select a value but it will have no impact on the search results.
-
Select the control. The control configuration pane is displayed on the right-hand side, as shown in Figure 16.
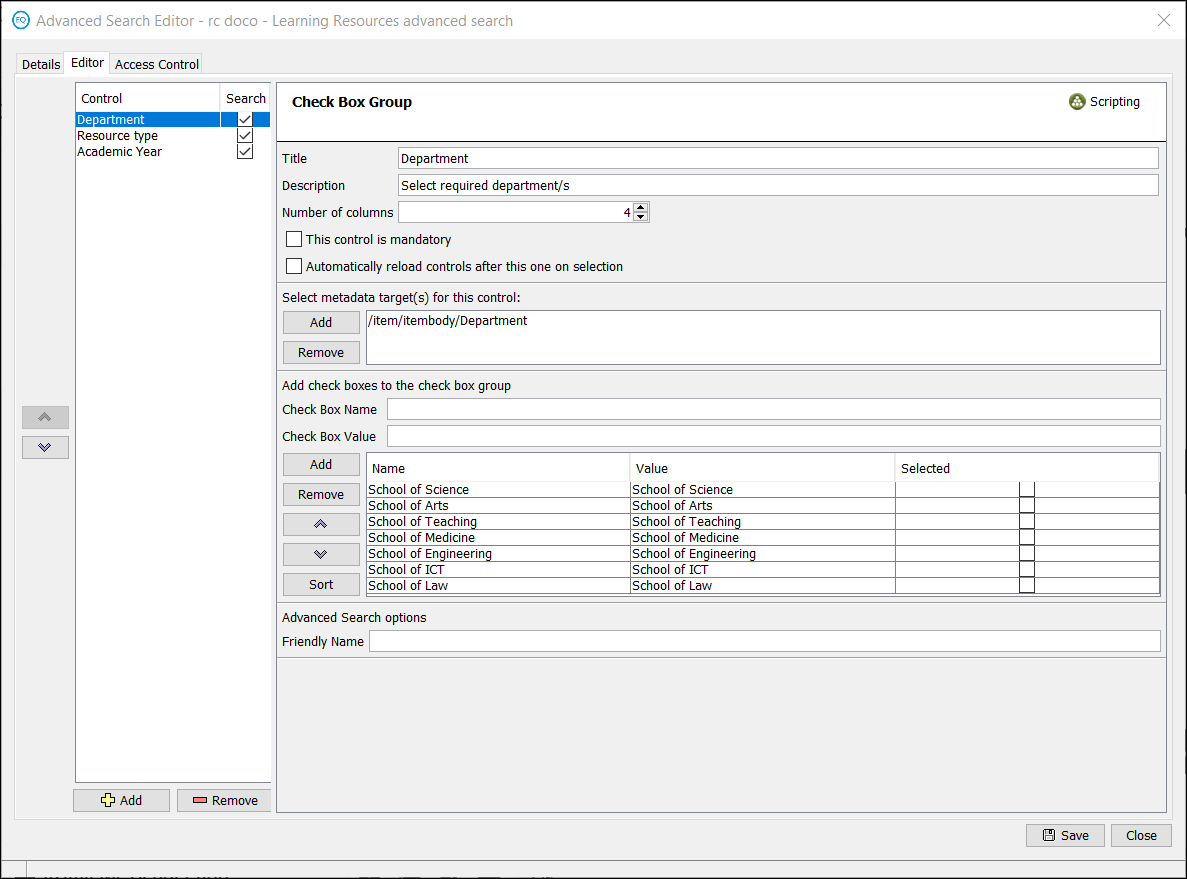
Figure 16 Advanced Search Editor—control configuration pane
-
Configure the selected control as required.
-
Add further controls as necessary
An example of the user view of the Learning resources advanced search criteria page is shown in Figure 18.
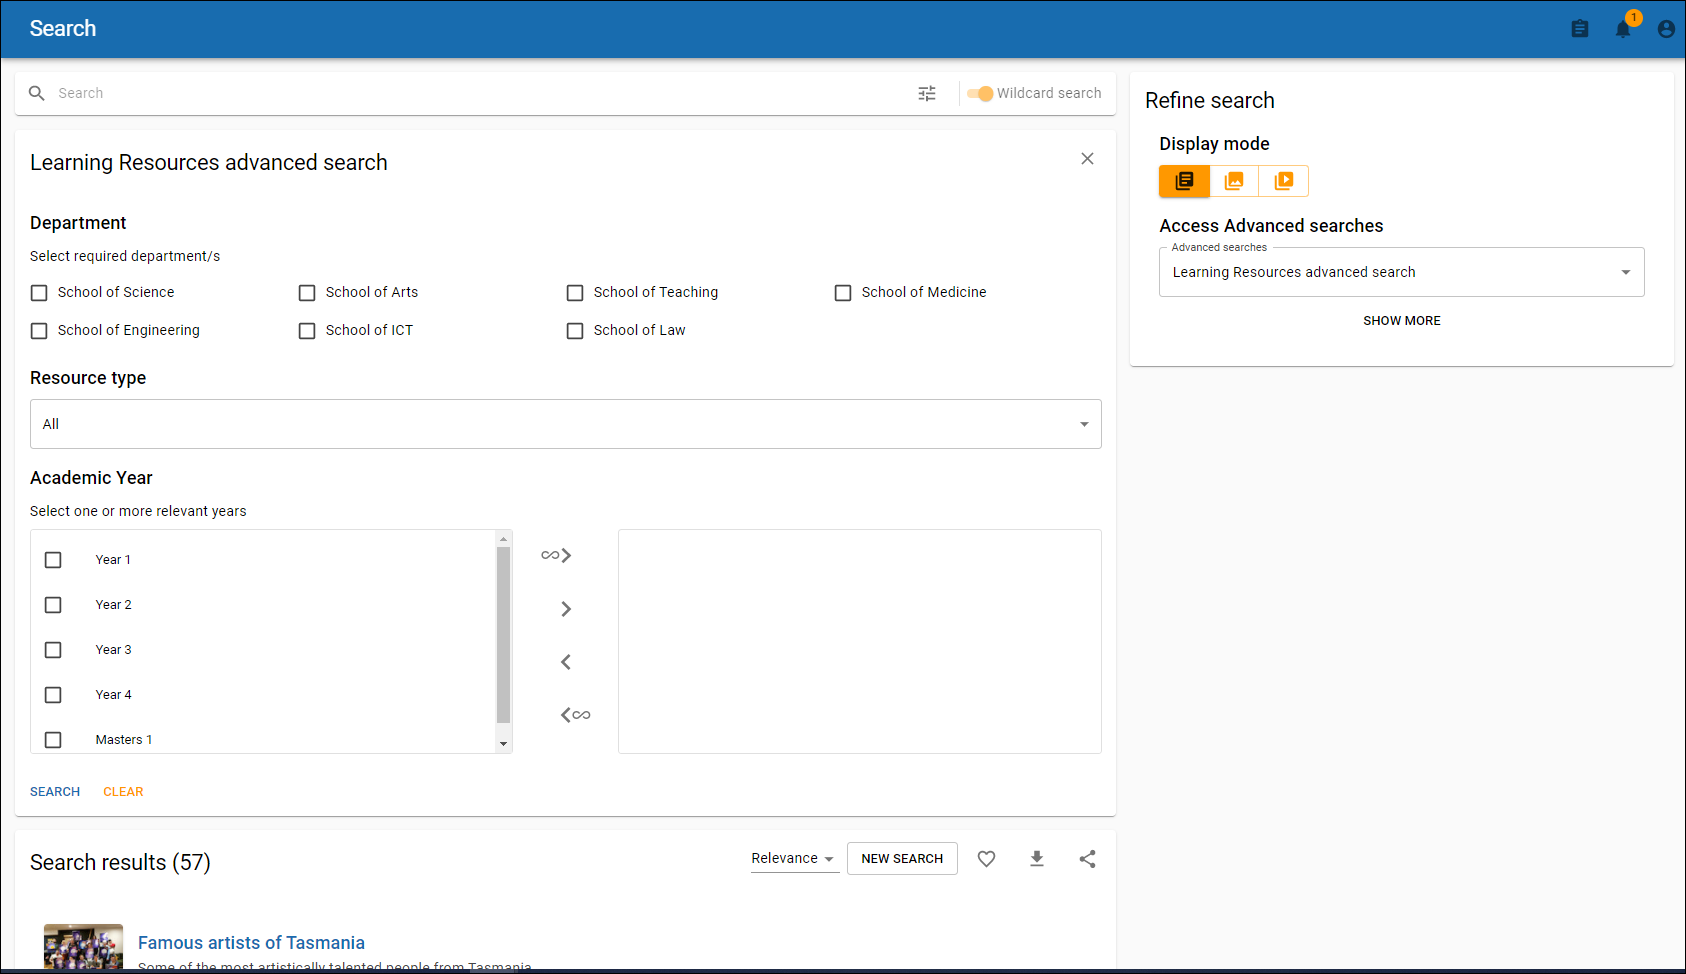
Figure 18 Learning resources advanced search page
Friendly name
NOTE: Friendly name is used only in the openEQUELLA legacy UI
Each control in the advanced search editor page except Raw HTML and User selector has a Friendly Name field at the bottom of the control editor page. An example is shown in Figure 19.
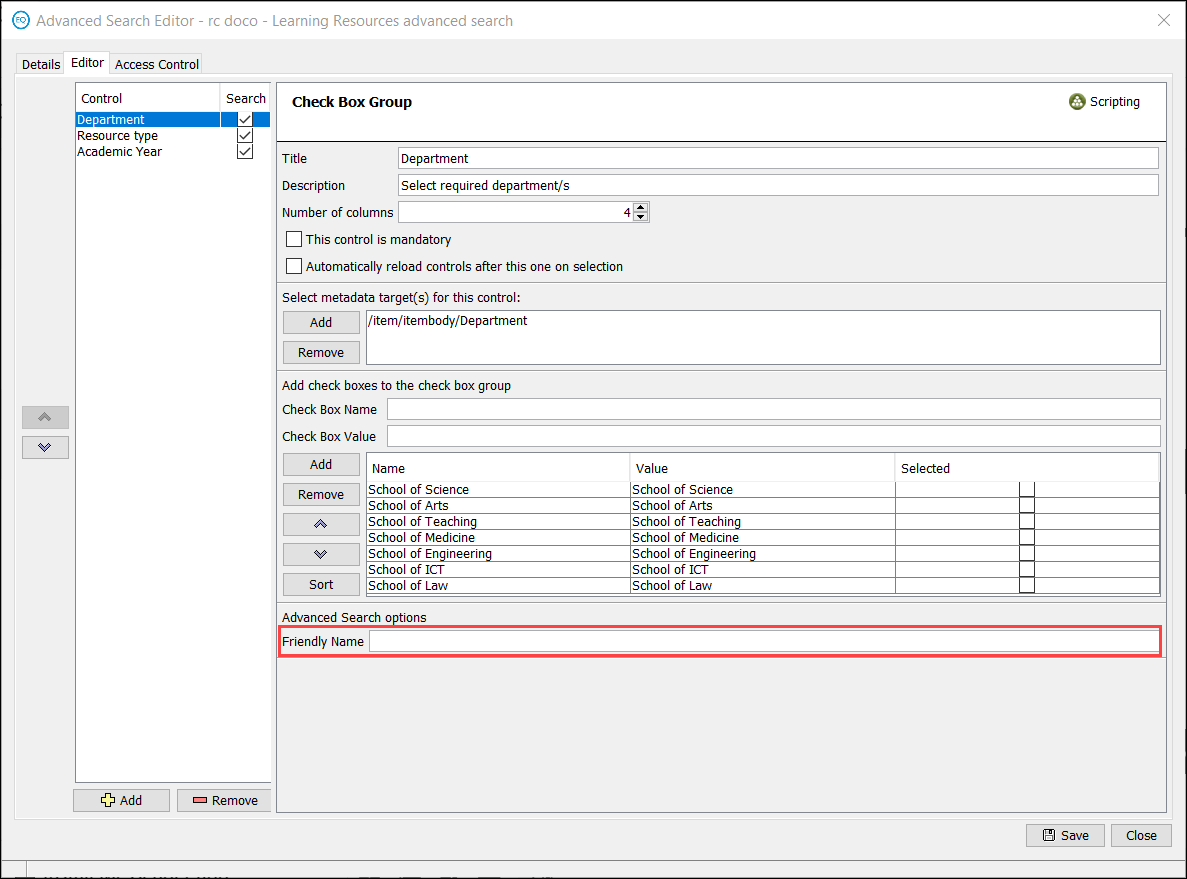
Figure 19 Friendly Name field
The name entered in this field displays on the results page once the advanced search has been activated, instead of the xml schema path. The text entered in this field for a control displays when an element from that control is selected on the search criteria page.
Using the example where the Friendly Name ‘Resource type’ has been entered, shown in Figure 19, if the Format of resource ‘Image’ checkbox is selected from the search criteria page, the search box displays ‘Resource type is Image’. An example of the results page without a friendly name is shown in Figure 20 and an example with the friendly name is shown in Figure 21.
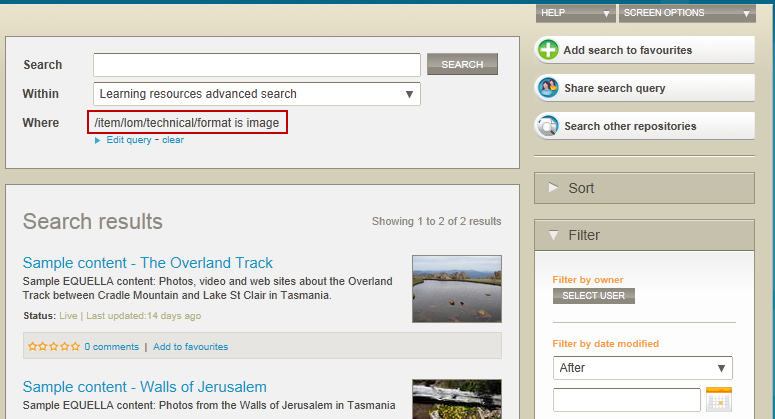
Figure 20 Advanced search results page(legacy UI) with xml path (no Friendly Name)
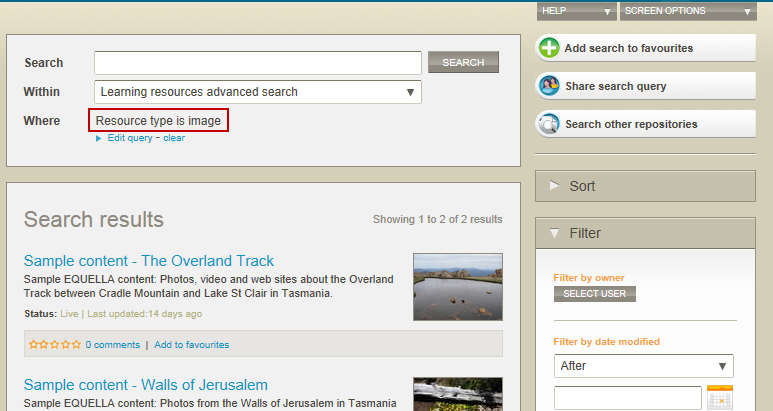
Figure 21 Advanced search results page (legacy UI)with ‘Friendly Name’
Access Control tab
The Access Control tab allows the administrator to configure user access to the selected search. There are three privileges that can be granted: delete this advanced search, edit this advanced search, and search for items with this advanced search.
The following is an example of how to configure the Access Control page. Any user or group can be assigned as owners of a search. This example grants privileges to the system administrator and viewer roles.
To configure this page to restrict access to the system administrator
-
Select the Access Control tab. The Access Control page is displayed, as shown in Figure 22.

Figure 22 Advanced Search Editor—Access Control tab
-
Click the Who can? drop-down arrow and select the delete this advanced search option.
-
Select the Advanced option. The Advanced screen displays, as shown in Figure 23.
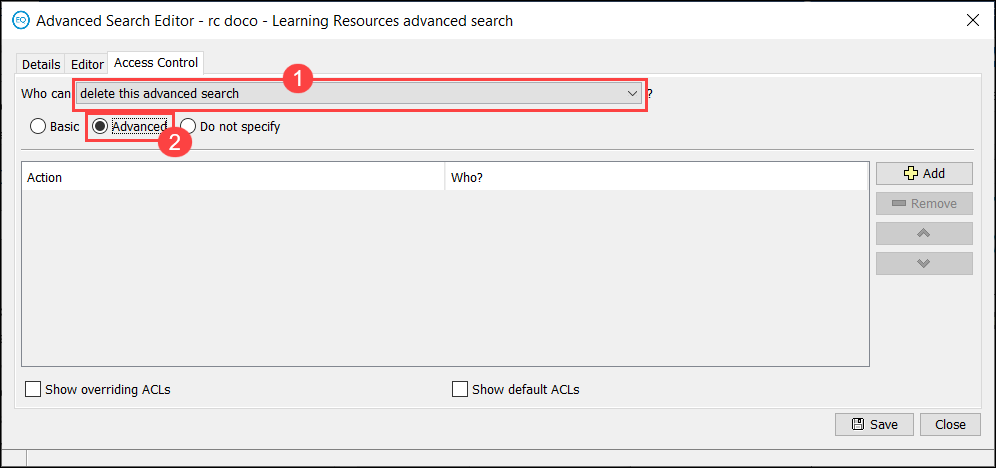
Figure 23 Access Control—Advanced page
-
Click Add.
-
In the Action field, make sure Grant displays. If displaying Revoke, click on the field and change to Grant.
-
In the Who? field, click on Everyone. The Select Recipients… dialog displays, as shown in Figure 24. This dialog allows a search for users, groups or roles to grant access to.
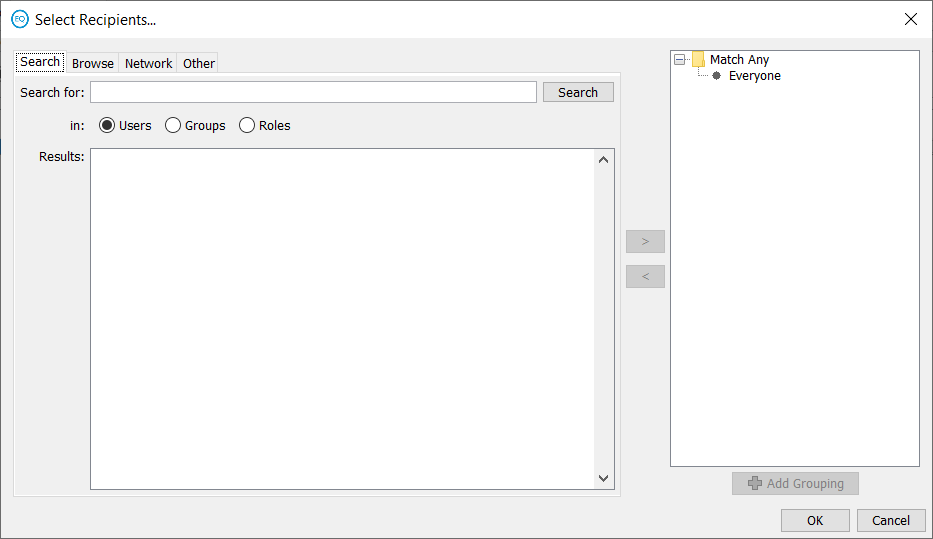
Figure 24 Select Recipients… dialog
-
Select the Roles radio button.
-
Click Search to display a list of available roles to choose from. Alternatively, type the first letter or letters of a search item and click Search.
-
Select Everyone in the right-hand pane and use the left arrow button to move it to the left-hand pane.
-
Highlight System Administrator Role in the left-hand pane and move to the right-hand pane using the right button, as shown in Figure 25.
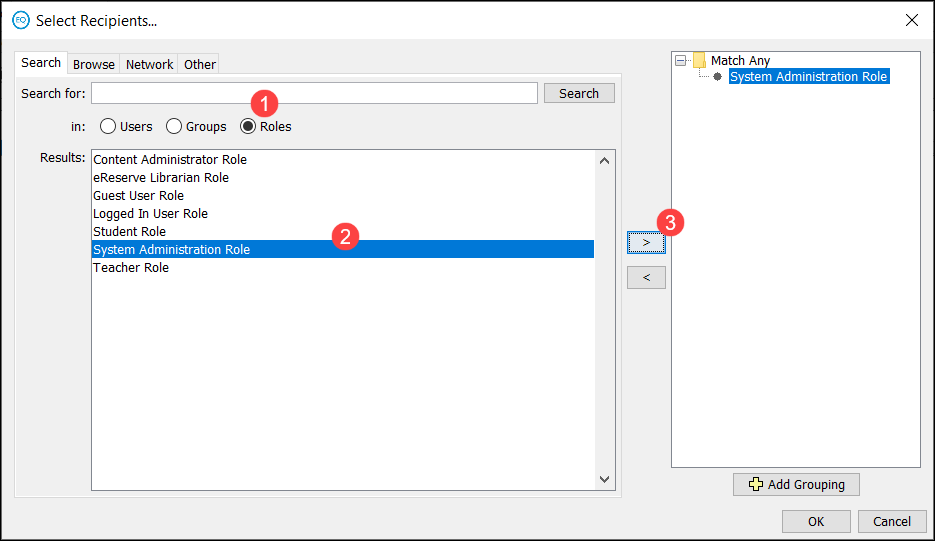
Figure 25 Selected role added
-
Click OK to close the dialog.
The delete privilege has now been granted to the system administrator, as shown in Figure 26.
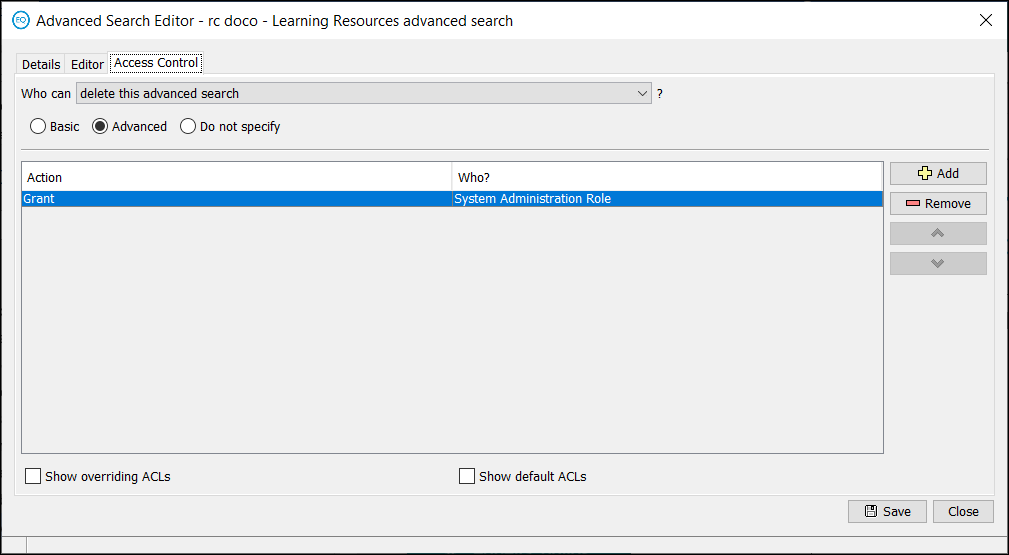
Figure 26 Completed access control configuration
- Select edit this advanced search from the Who can? drop-down list and configure access to the option by repeating steps 3 to11.
To configure this tab to restrict access to the Viewer role
- Select search for items with this advanced search from the Who can? drop-down list and grant the Viewer Role access to this option by repeating steps 3 to 11.
Further security options can be added or deleted using the Add or Remove buttons.
Save a search
When all elements have been configured for a search:
-
Click Save to save the search details.
-
Click Close to close the Advanced Search Editor.