openEQUELLA 2019.2 Features Guide
Table of Contents
- Duplicate checking
- Displaying deleted user names
- Taxonomy term sorting
- New taxonomy REST APIs
- Comprehensive modern theme for new UI
Duplicate checking
openEQUELLA 2019.2 sees the introduction of attachment duplicate checking, as well as enhancements to the existing edit box duplicate checking functionality.
Prerequisite task - create attachment MD5 hashes
To ensure all existing attachment files can be detected as duplicates during contribution, a one-off manual data fix needs to be run to create any missing MD5 hashes.
To run the Attachment hashing task
- From Settings, Diagnostics, select Manual data fixes. The Manual data fixes page displays, as shown in Figure 1
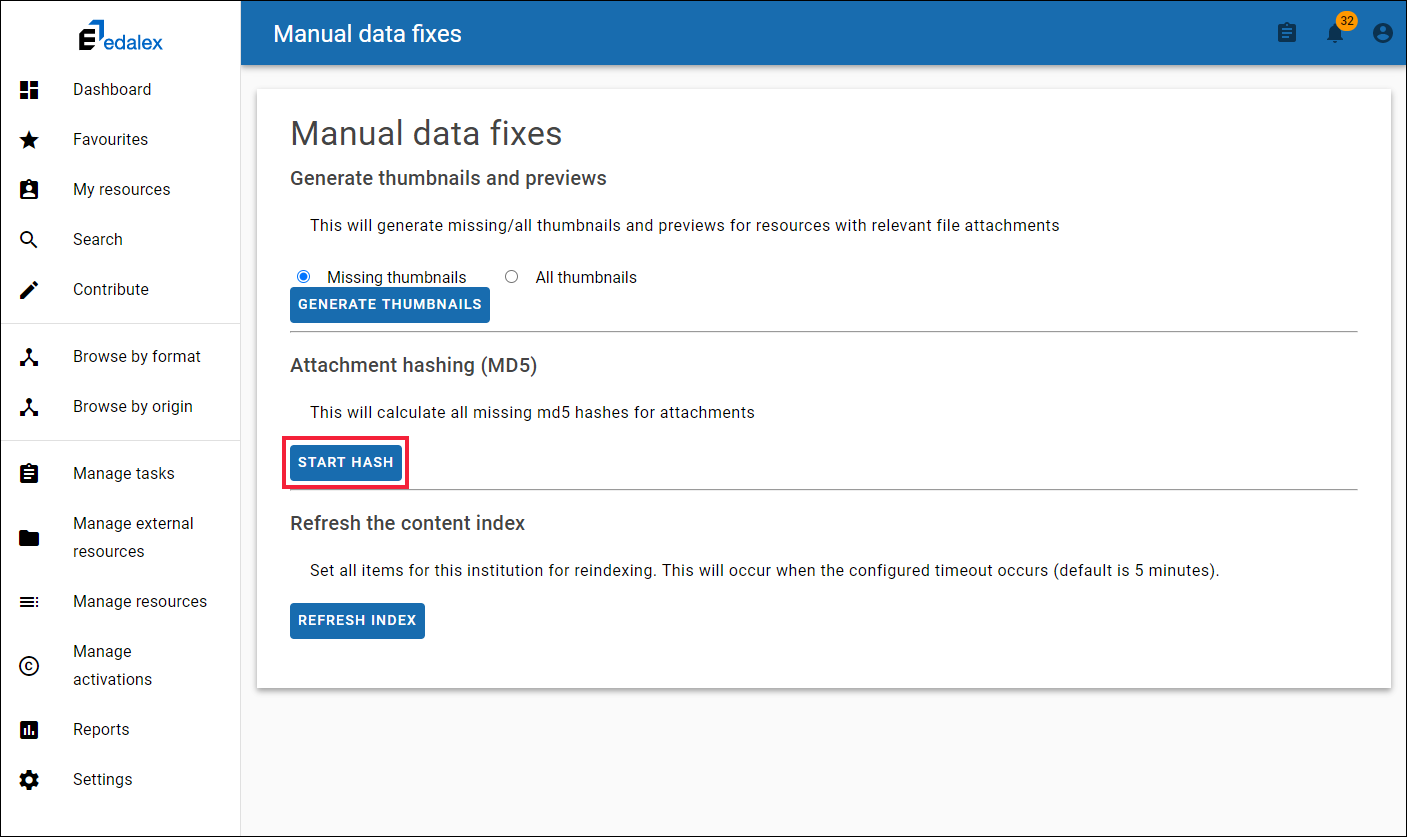
Figure 1 Manual data fixes page - Attachment hashing (MD5)
- In the Attachment hashing (MD5) section, click START HASH. The job will run in the background and calculate any missing MD5 hashes.
Configuring duplicate checking
Duplicate checking is configured from the attachment or edit box wizard control in the Collection Definition Editor, accessed from the Administration Console.
Attachments
Attachment duplicate checking allows administrators to notify contributors of existing items that have the same attachments. This includes Files and URL Links attachment types. For example, if duplicate checking is enabled for ‘Files’ in an attachment control in a contribution wizard, the contributor sees a Duplicate warning message if a file a contributor uploads is an exact match to a file or URL that has been uploaded in one or more existing items in the same collection. A link is provided to those items so they can be viewed before proceeding.
The duplicate checking for attachments is switched on in the configuration sections for Files and URL Links attachment types.
To enable File duplicate checking
- From the Administration Console, select Collection Definitions. An example is shown in Figure 1

Figure 1 Administration Console - Collection Definitions
-
Double click the collection containing the relevant attachment control (or highlight and select Edit).
-
From the Wizard tab, select the attachment control with the Files attachment type that requires duplicate checking to be applied.
-
Scroll to the Files configuration section and check Enable duplicate checking. An example is shown in Figure 2.
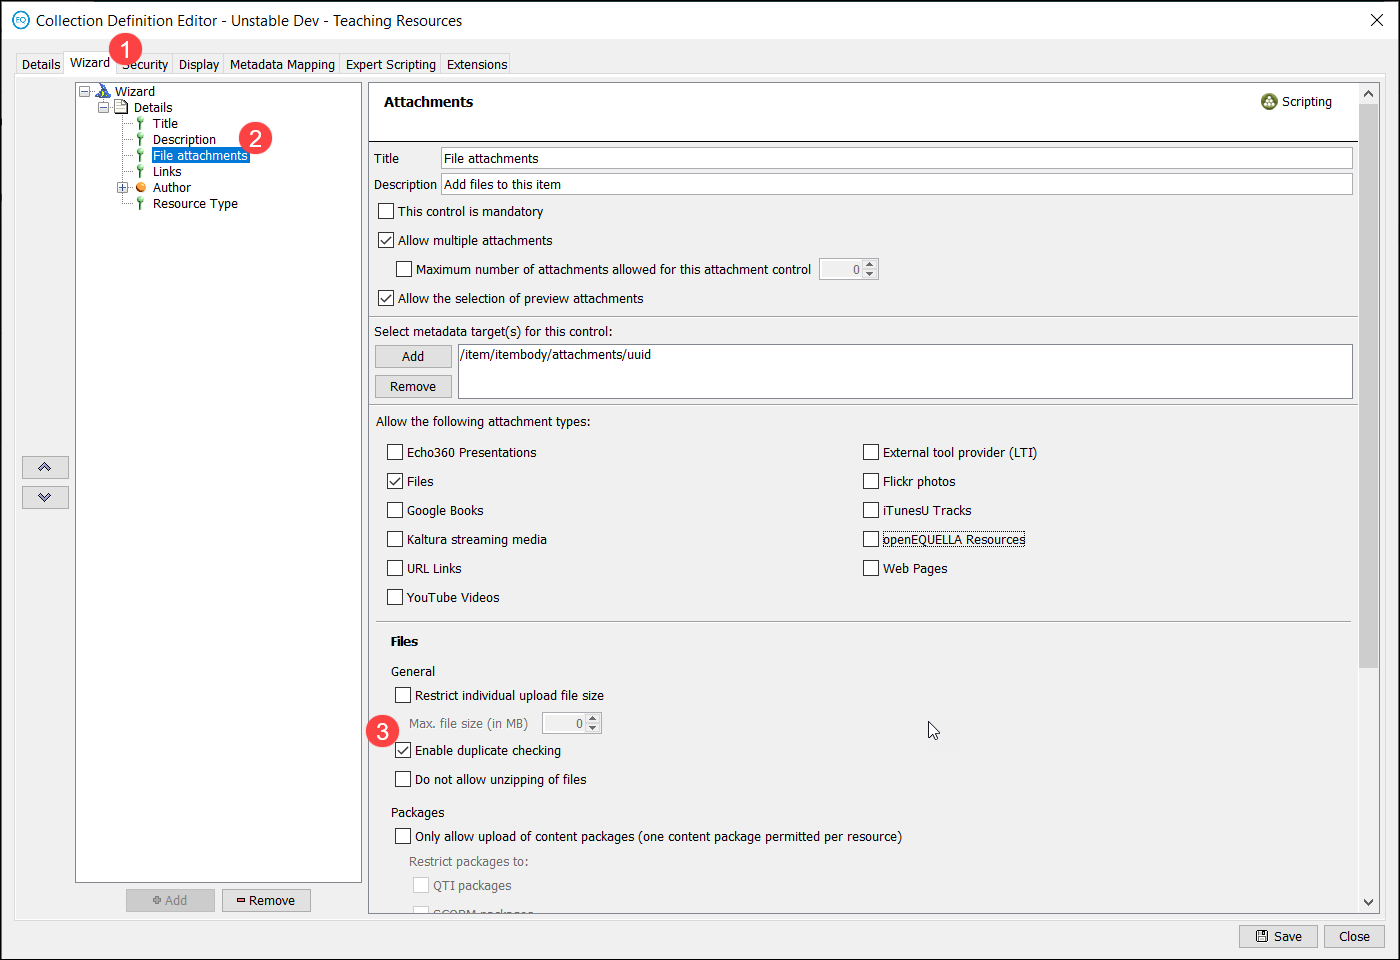
Figure 2 Attachment control – Files configuration
- Click Save.
To enable URL duplicate checking
- From the Administration Console, select Collection Definitions. An example is shown in Figure 3.
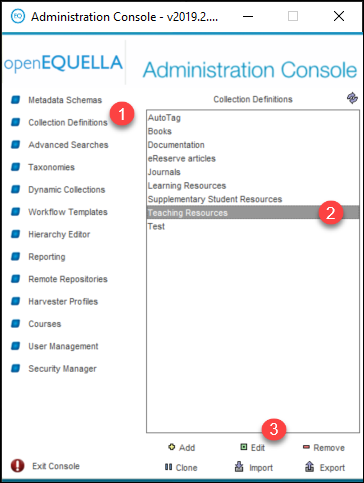
Figure 3 Administration Console - Collection Definitions
-
Double click the collection containing the relevant attachment control (or highlight and select Edit).
-
From the Wizard tab, select the attachment control with the URL Links attachment type that requires duplicate checking to be applied.
-
Scroll to the URL Links configuration section and check Enable duplicate checking. An example is shown in Figure 4.
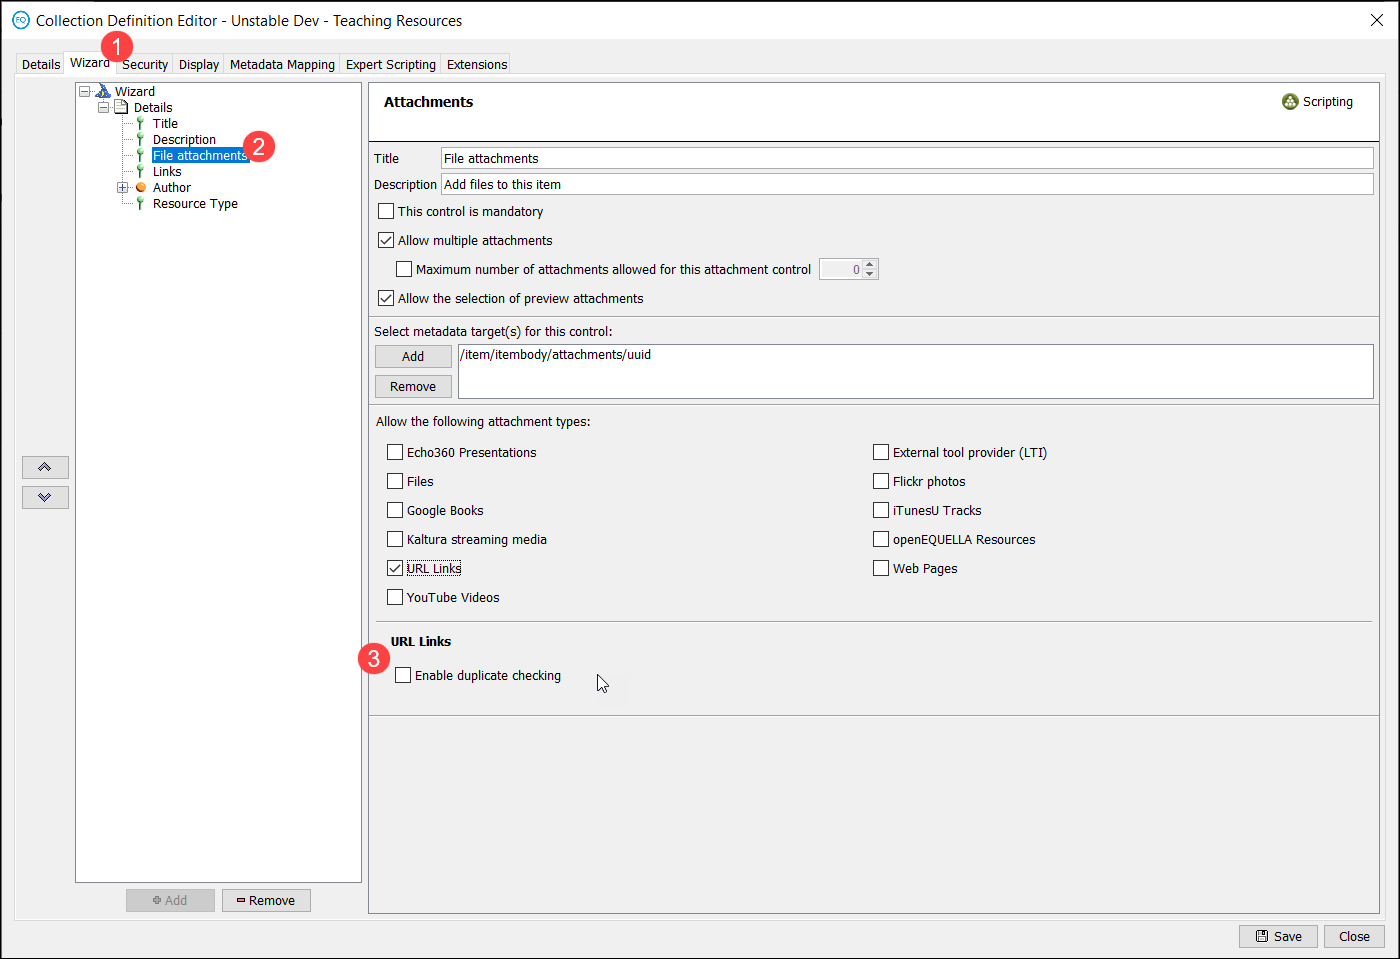
Figure 4 File attachment control – URL Links configuration
- Click Save.
Edit boxes
Duplicate checking for edit boxes allows administrators to notify contributors of existing items that contain the exact text string entered in the same edit box field. For example, if duplicate checking is enabled for the ‘Title’ edit box in a contribution wizard, the contributor sees a Duplicate warning message if the text they have entered for the title is an exact match to the text in the ‘Title’ field for one or more existing items in the same collection. A link is provided to those items so they can be viewed before proceeding.
Duplicate checking can be switched on for multiple edit box wizard controls in one collection. For example, duplicate checking could be enabled for both the ‘Title’ and ‘Description’ fields in one contribution wizard. Any text entered in the ‘Title’ field would be matched against existing item titles within the collection, and any text entered in the ‘Description’ field matched against existing item descriptions within the collection.
To enable Edit box duplicate checking
- From the Administration Console, select Collection Definitions. An example is shown in Figure 5.

Figure 5 Administration Console - Collection Definitions
-
Double click the collection containing the relevant edit box (or highlight and select Edit).
-
From the Wizard tab, select the edit box that requires duplicate checking to be applied.
-
Select Warn contributor if data in this field is not unique for resources in this collection. An example is shown in Figure 6.
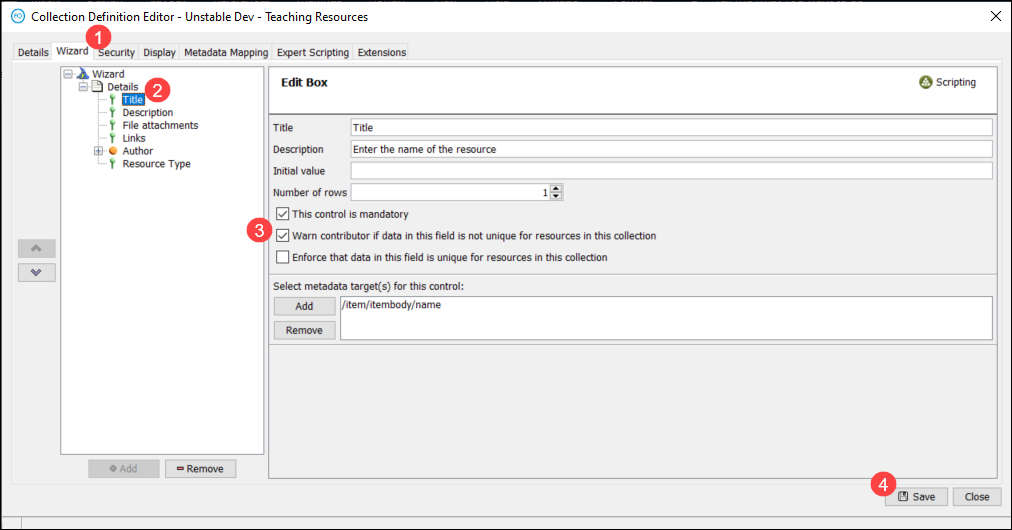
Figure 6 Collection Definition Editor - Wizard tab
- Click Save.
Duplicate checking during contribution
Duplicate checking occurs during the contribution and editing of items.
Attachment duplicate checking
A duplicate warning message displays as soon as a file has completed uploading or a URL Link is added if an exact match is identified in one or more existing items in the same collection.
File duplicate checking works using MD5 hashes, so the same files with different names are still identified as duplicates if uploaded.
URL duplicate checking works on an exact name match, so entries must be identical (for example, https://www.edalex.com/openequella and https://www.edalex.com/openequella/ would not be detected as duplicates because of the / at the end of one.
NOTE: Attachment duplicate checking does not search for matches in items with the status of Deleted, Suspended, Archived or Rejected.
An example is shown in Figure 7.
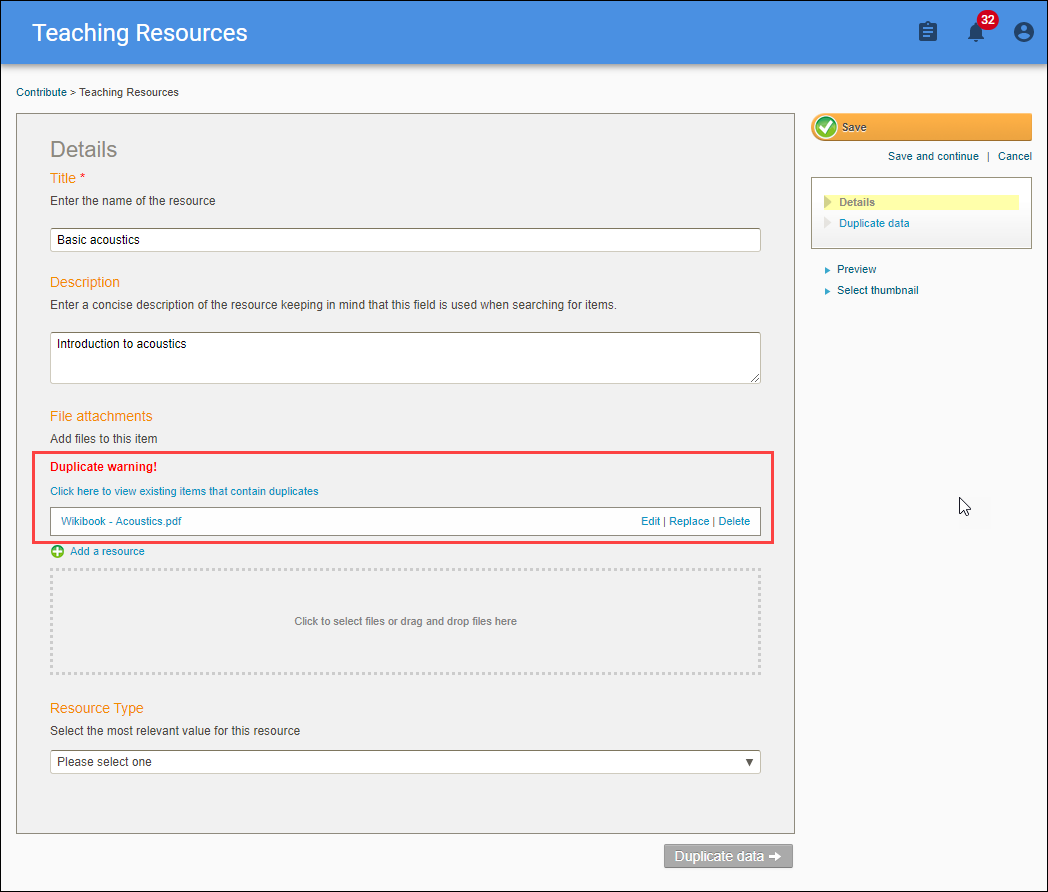
Figure 7 File duplicate warning
Click on the Click here to view existing items that contain duplicates link to open the Duplicate data page. A list of items containing matching text displays. An example is shown in Figure 8.
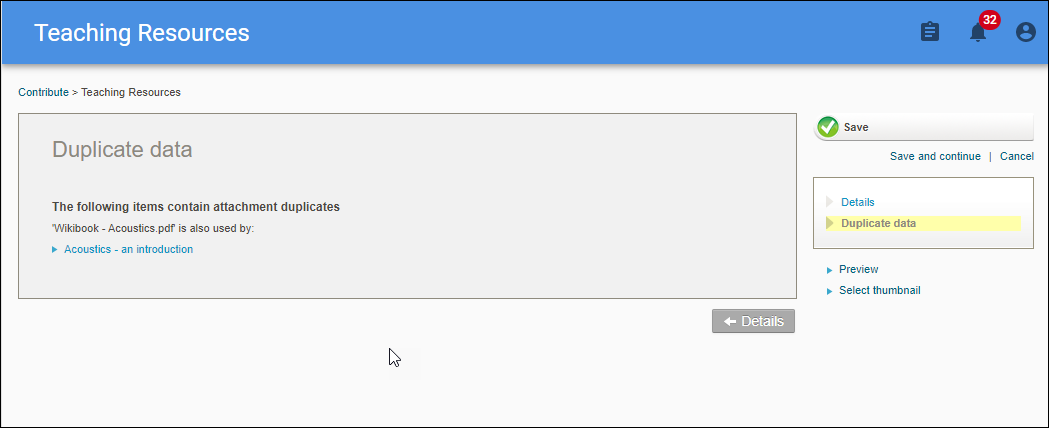
Figure 8 Duplicate data page
Note that the contributor can choose to ignore the duplicate warning and save the item without opening the link. The Duplicate data page can still be viewed when editing the item.
Click on the item links to open the items in new tabs.
The Duplicate data page can also be accessed from the pages box and using the navigation button.
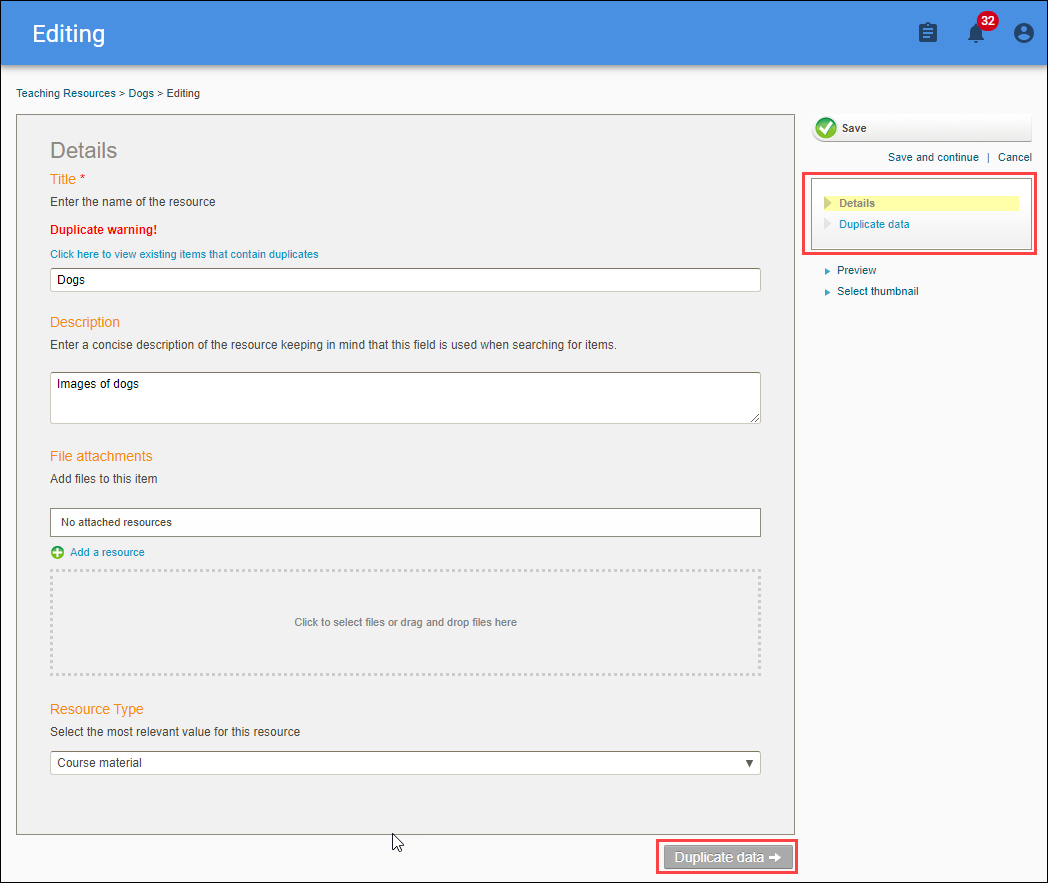
Figure 9 Navigating to Duplicate data page
Edit box duplicate checking
A duplicate warning displays as soon as the focus moves from the edit box when an exact match is identified in one or more items in the same collection. An example is shown in Figure 10.
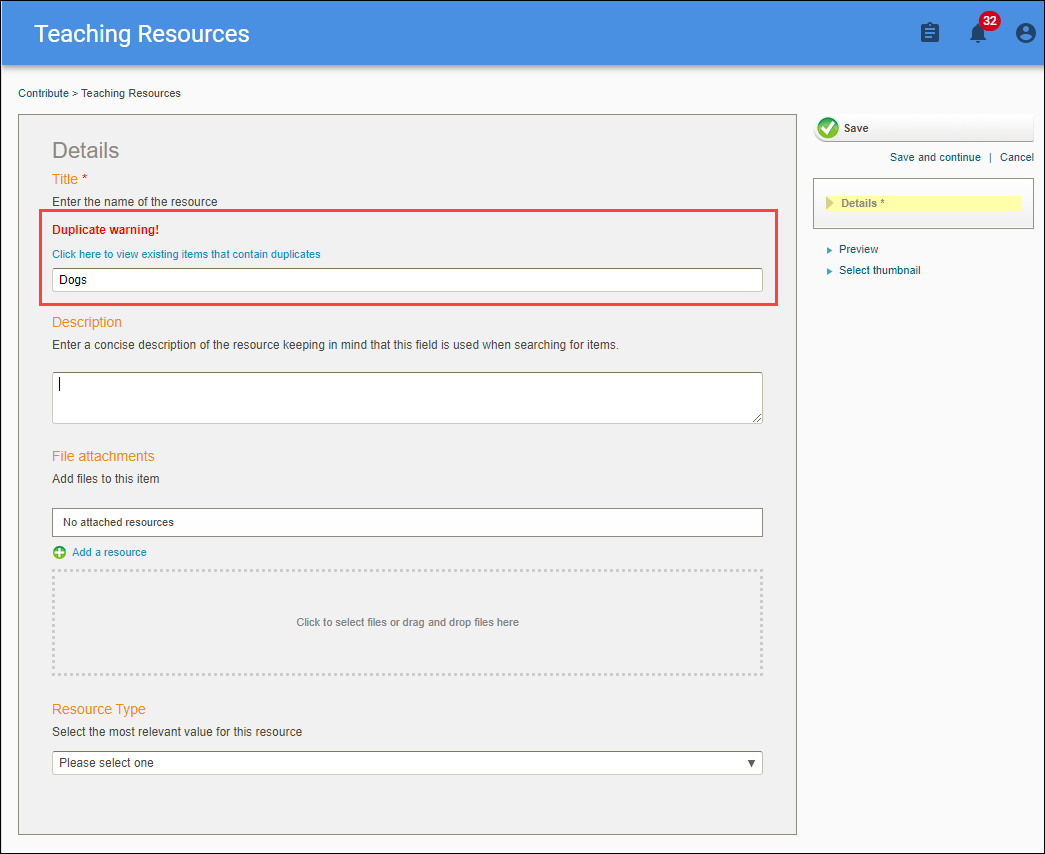
Figure 10 Edit box duplicate warning
Note that the contributor can choose to ignore the duplicate warning and save the item without opening the link. The Duplicate data page can still be viewed when editing the item.
Click on the Click here to view existing items that contain duplicates link to open the Duplicate data page. A list of items containing matching text displays. An example is shown in Figure 11.
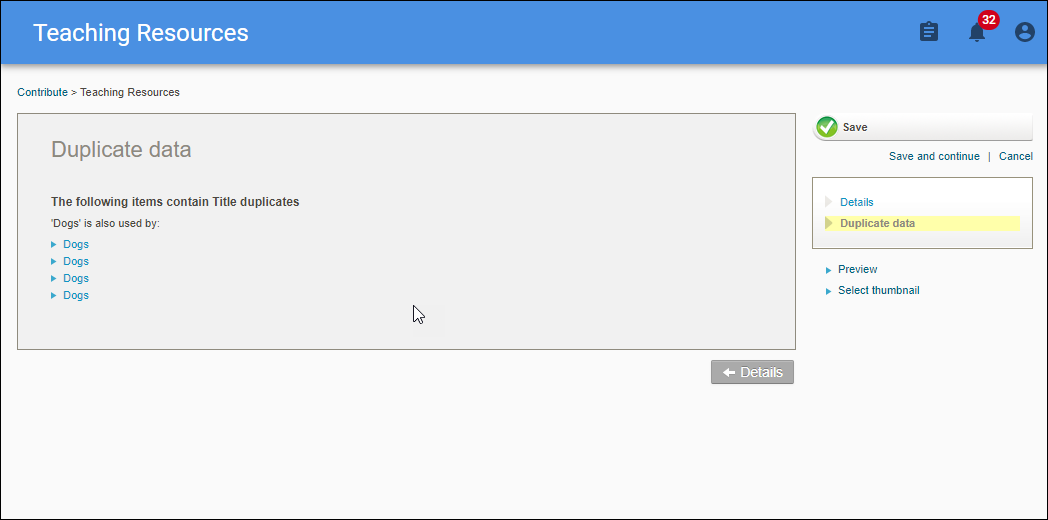
Figure 11 Duplicate data page
Click on the item links to open the items in new tabs.
The Duplicate data page can also be accessed from the pages box and using the navigation button. An example is shown in Figure 12.
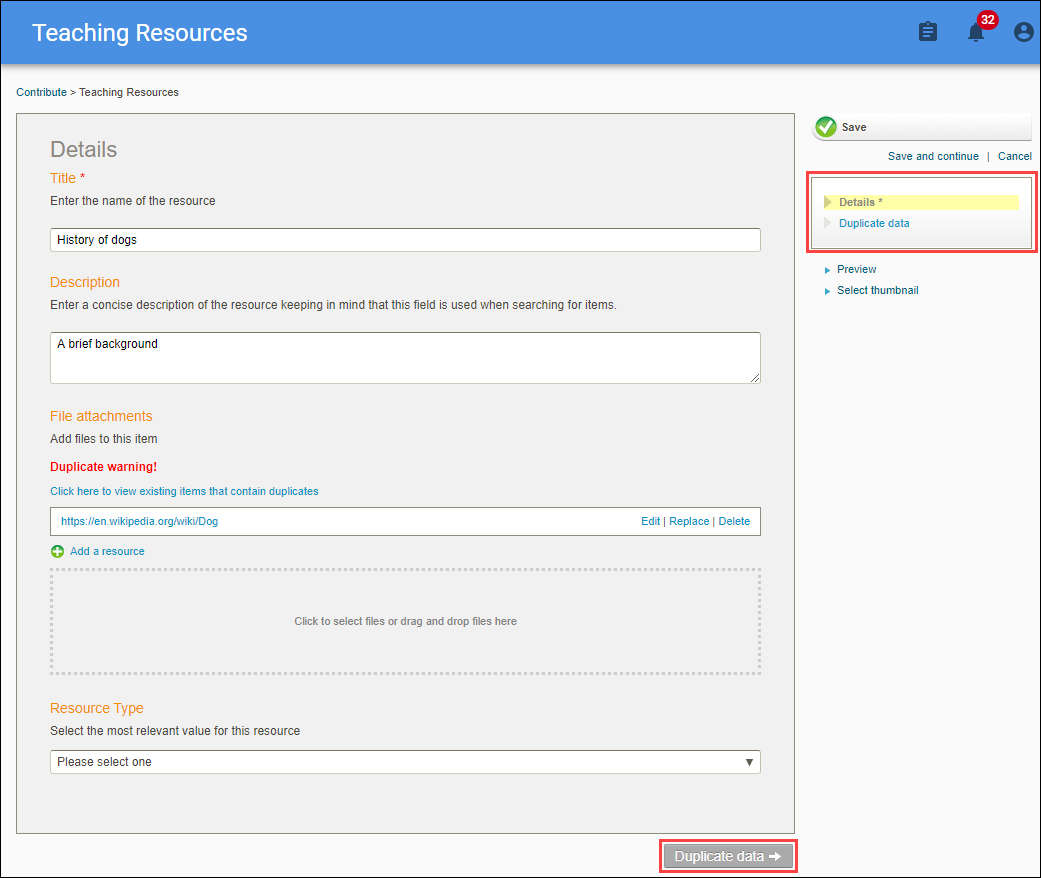
Figure 12 Navigating to Duplicate data page
Multiple duplicate types
In the case of the detection of multiple duplicates across edit boxes and attachment controls during contribution, openEQUELLA shows multiple duplicate warnings. An example is shown in Figure 13.
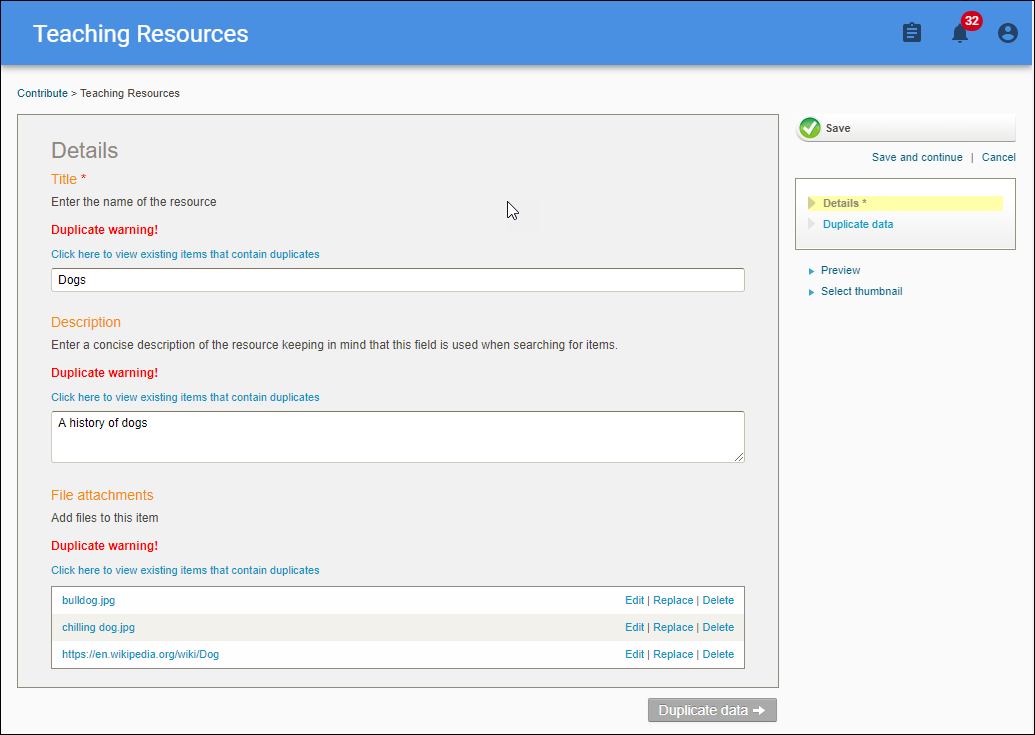
Figure 13 Item contribution with multiple duplicate warnings
The Duplicate data page displays the duplicate items for each wizard control separately. Additionally, for multiple attachment duplicates, each attachment is listed separately. An example is shown in Figure 14.
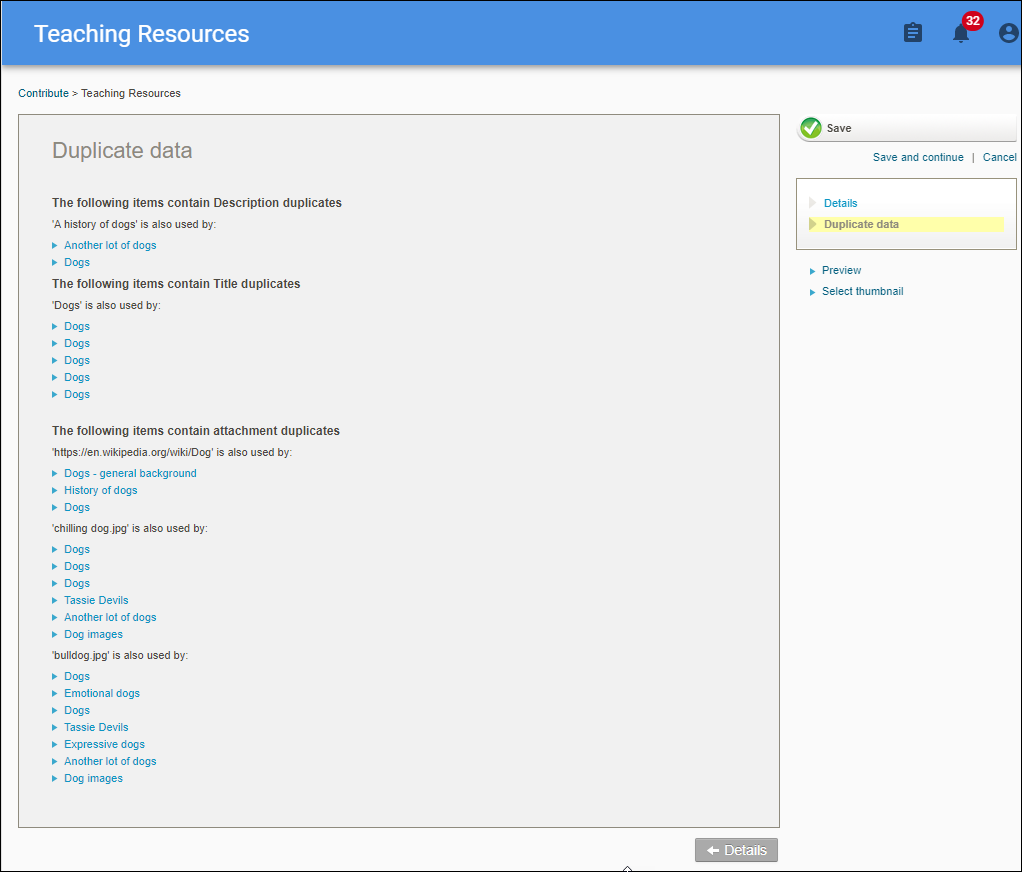
Figure 14 Duplicate data page with multiple duplicate lists
Displaying deleted user names
openEQUELLA 2019.2 now stores owner details in the database so that if a user is deleted, past ownership and moderation information are not lost.
NOTE: Users must log in to openEQUELLA at least once prior to their deletion for this functionality to apply.
When a user is removed from openEQUELLA, the system will now display the deleted user’s name with the word ‘removed’ in brackets e.g. Joe Bloggs (removed) instead of ‘Unknown user’ in the Owner field, the Moderation history page and the Owners and collaborators page. This applies to both local openEQUELLA users and users managed by integrated external user management systems such as LDAP.
An example of the Resource summary page for an item with a deleted owner is shown in Figure 15.
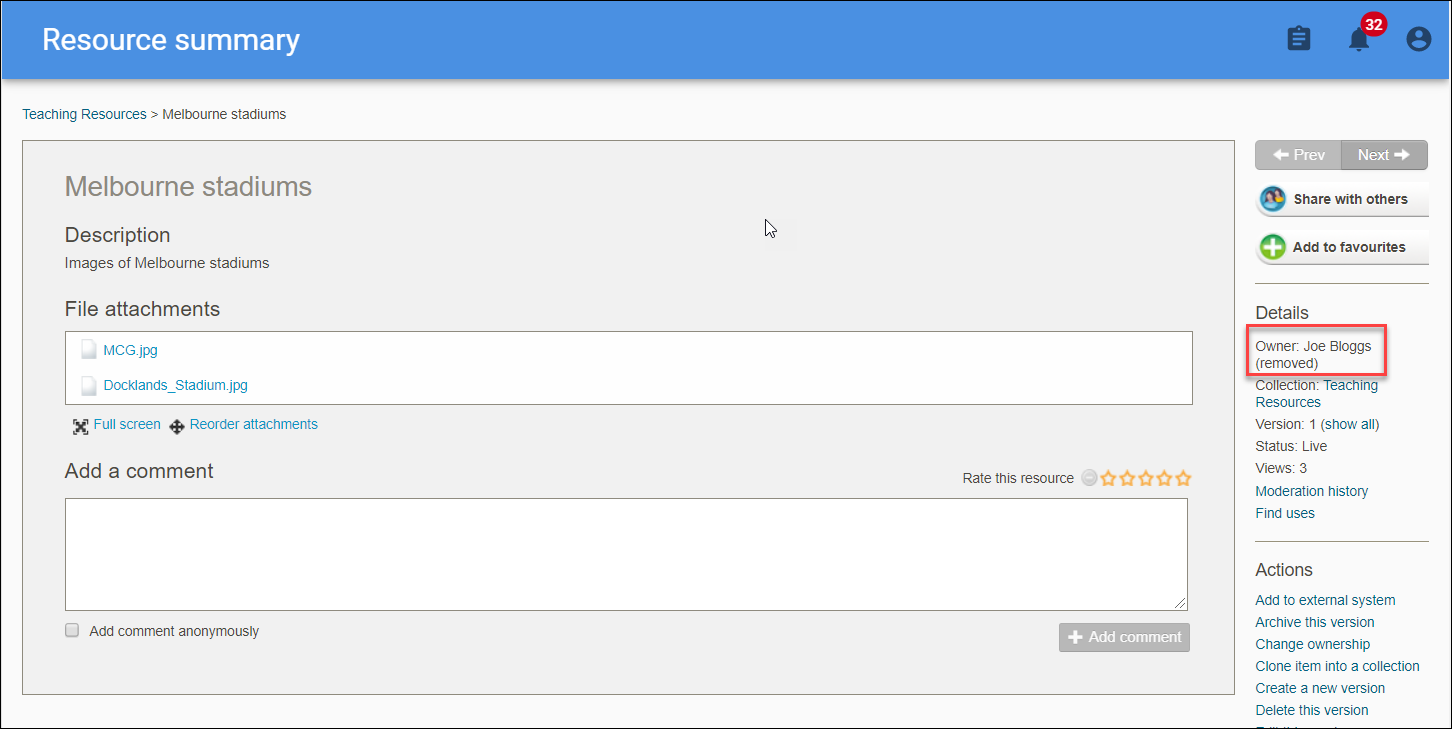
Figure 15 Owner field with deleted user’s details
An example of the Moderation history page (accessed from Details, Moderation History) with a deleted user’s details is shown in Figure 16.
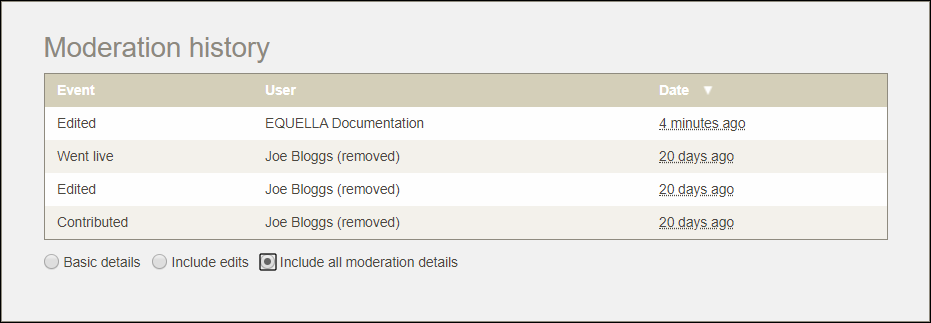
Figure 16 Moderation history page with deleted user details
NOTE: If an item has been through a workflow process, the details of any workflow task moderators that have been removed from the system display on this page.
An example of the Owner and collaborators page (accessed from Actions, Change ownership) is shown in Figure 17.
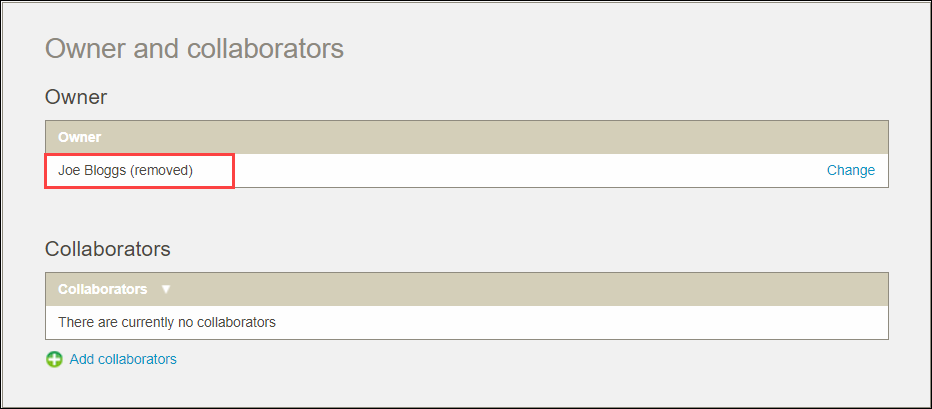
Figure 17 Owners and collaborators page with deleted user details
Filtering items with deleted owners
The existing Show items with no owner filtering option accessed from the Filter panel on the Manage Resources page can be used to view only items that have a deleted user recorded as the owner. It will also return any records that have the original ‘Unknown user’ label displaying for users that were deleted prior to the openEQUELLA 2019.2 update.
An example is shown in Figure 18.
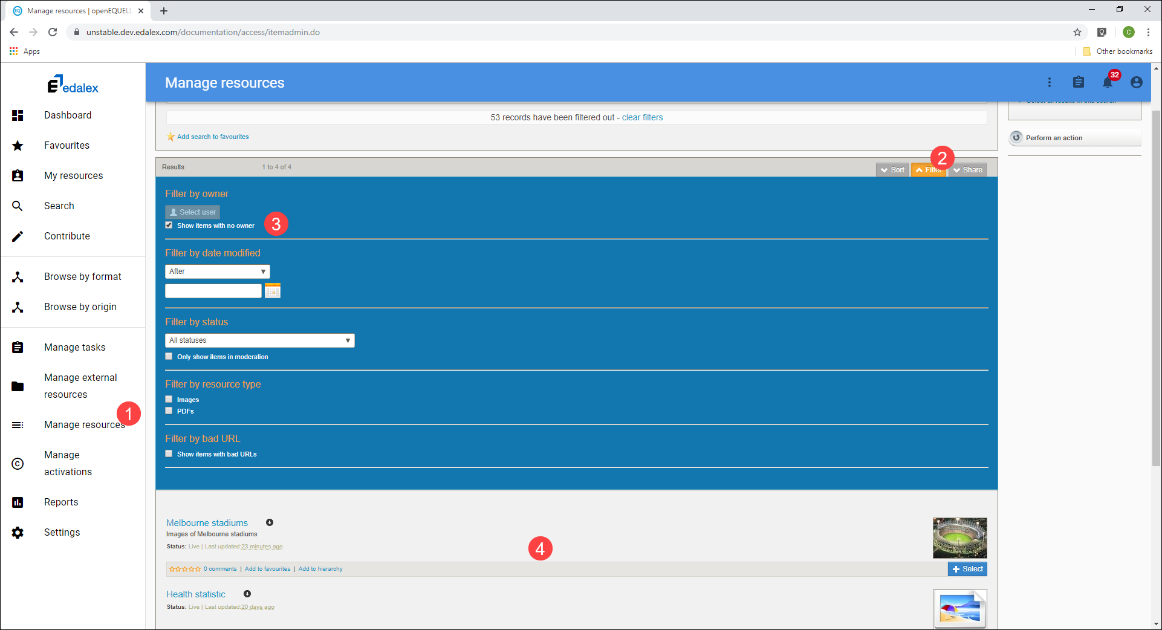
Figure 18 Manage resources - Show items with no owner filter option
Taxonomy term sorting
A new option has been added to the Terms tab in the Taxonomy editor to allow taxonomy terms to be sorted alphabetically across the whole taxonomy or the child terms for a selected taxonomy level.
To sort child taxonomy terms
- From the Administration Console, select Taxonomies. An example is shown in Figure 19.

Figure 19 Administration Console - Taxonomies
-
Double click the taxonomy to be sorted (or highlight and select Edit).
-
From the Terms tab, right click on a taxonomy level to sort the child terms for that level then select Sort Child Terms. An example before sorting is shown in Figure 20.
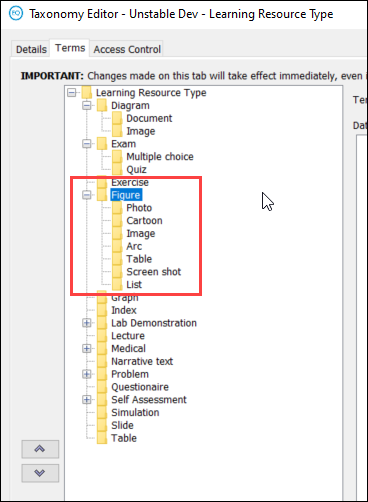
Figure 20 Selected taxonomy level
An example of the right-click menu with the sorting option in shown in Figure 21.
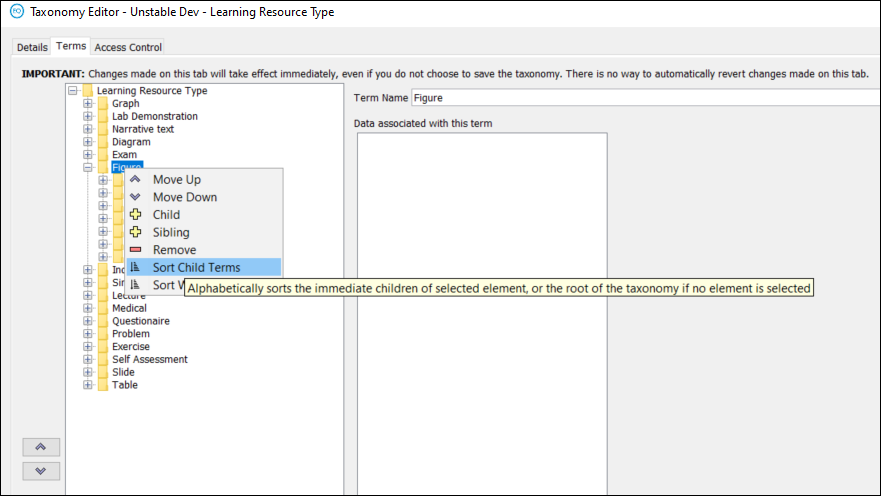
Figure 21 Right-click menu - Sort Child Terms
An example after the terms have been sorted is shown in Figure 22.
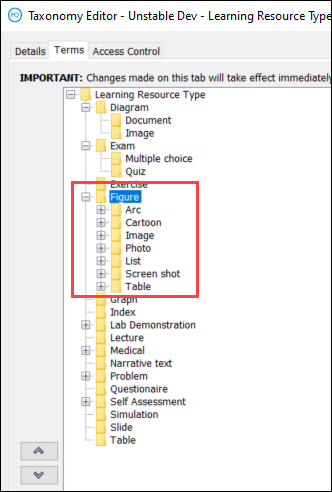
Figure 22 Sorted child terms
To sort across the whole taxonomy
- From the Administration Console, select Taxonomies. An example is shown in Figure 23.
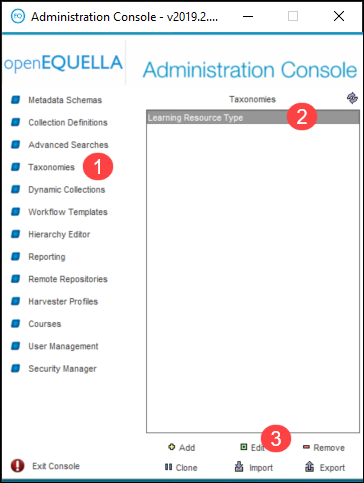
Figure 23 Administration Console - Taxonomies
-
Double click the taxonomy to be sorted (or highlight and select Edit).
-
From the Terms tab, right click on any taxonomy level then select Sort Whole Taxonomy. An example before sorting is shown in Figure 24.
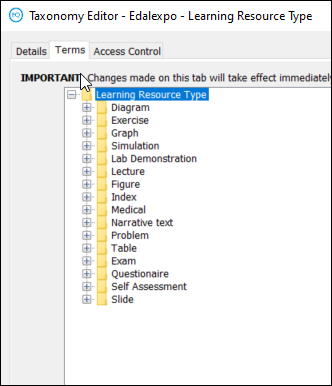
Figure 24 Sort Whole Taxonomy menu option
An example of the right-click menu with the sorting option in shown in Figure 25.
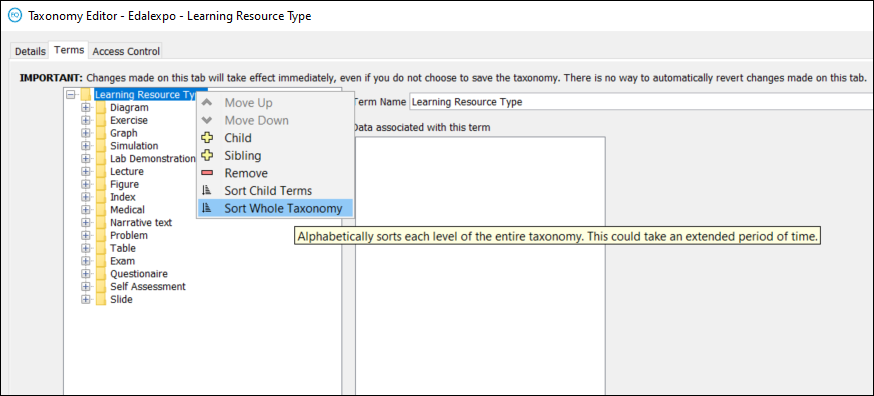
Figure 25 Right-click menu - Sort Whole Taxonomy
NOTE: Every level of taxonomy is sorted alphabetically.
An example after the terms have been sorted is shown in Figure 26.
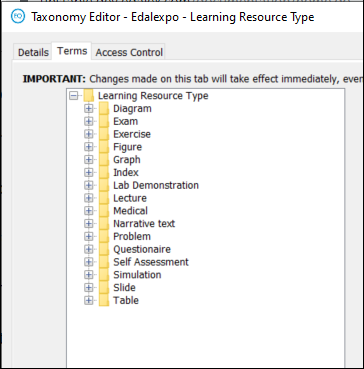
Figure 26 Sorted taxonomy
New taxonomy REST APIs
There are now REST APIs to:
- Create a new taxonomy
- Edit a taxonomy
- Sort each level of the whole taxonomy
- Sort child terms
- List global taxonomy ACLs
- Edit global taxonomy ACLs
To view more information and try these APIs, go to the API documentation accessed by adding apidocs.do to the end of your openEQUELLA institution’s URL (e.g. https//myuniversity.edalex.com/institution/apidocs.do)
Comprehensive modern theme for new UI
When the new user interface (UI) is switched on in openEQUELLA 2019.2, a modern UI theme is now displayed for all content by default via a new CSS. This provides a seamless and unified user experience, matching the areas that have not yet had the new UI technologies applied to those that have.
NOTE: This is a transitionary measure until the new React with Material Design technology is applied across the openEQUELLA UI and released in forthcoming versions.
When turning on the new UI in openEQUELLA 2019.2:
- The new theme is used by default when the new UI is switched on
- The Theming Editor now applies to all areas in openEQUELLA (not just the new UI areas as per prior releases)
- Customisations can still be applied using CSS